Using the API
API ScopesAPI CredentialsAPI LimitsAuthentication and AuthorizationAPI RequestsAPI ResponsesCustom Data FieldsUploading and Downloading DocumentsAPI EndpointsReporting EndpointsREST Hooks
REST Hooks and Event NotificationsAPI Demonstration Application
Introduction
To fast-track the learning process we have built a demonstration application that showcase a number of common scenarios and help you maximize the potential from the API. It shows how to construct both simple and complex requests and how to interpret the responses. It also shows how to implement the OAuth authentication protocol and manage refreshing access tokens.
Technology Stack
The application is built using Microsoft Blazor (C# and .NET Core) which is the new Web Assembly technology for building web applications in native languages. To build and run the application you will need to install Microsoft Visual Studio (Community Preview Edition) which is free to download. The source code includes a number of third-party open source components from Github, for example, Newtonsoft Json, and the Polly retry library, all of which will be pulled into the project when you build it.
Getting Started
Using Ngrok
In order to demonstrate the use of OAuth and REST (web) hooks from your local development machine we recommend using Ngrok to proxy incoming responses back to your localhost environment. Follow the installation instructions and sign up for your free authtoken. Once installed you simply need to execute the following script from a Windows command prompt:
c:\> ngrok http 50241 --host-header="localhost:50241" --region au
Ngrok supports a number of different regions. Select the region most suitable to your location.
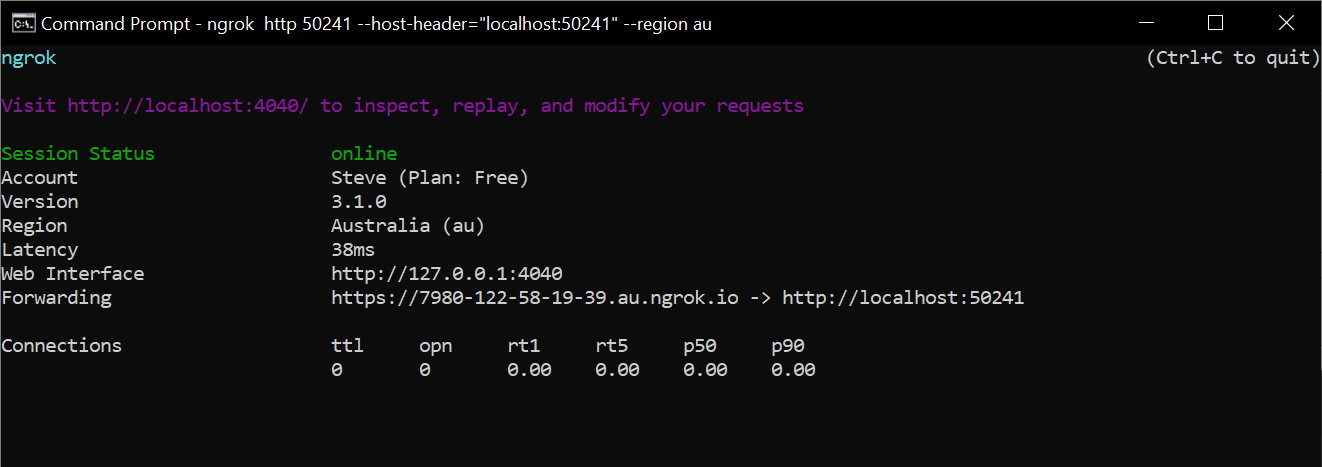
You can monitor request/responses using Ngrok. Open a new tab in your browser and go to http://localhost:4040
Running the Application
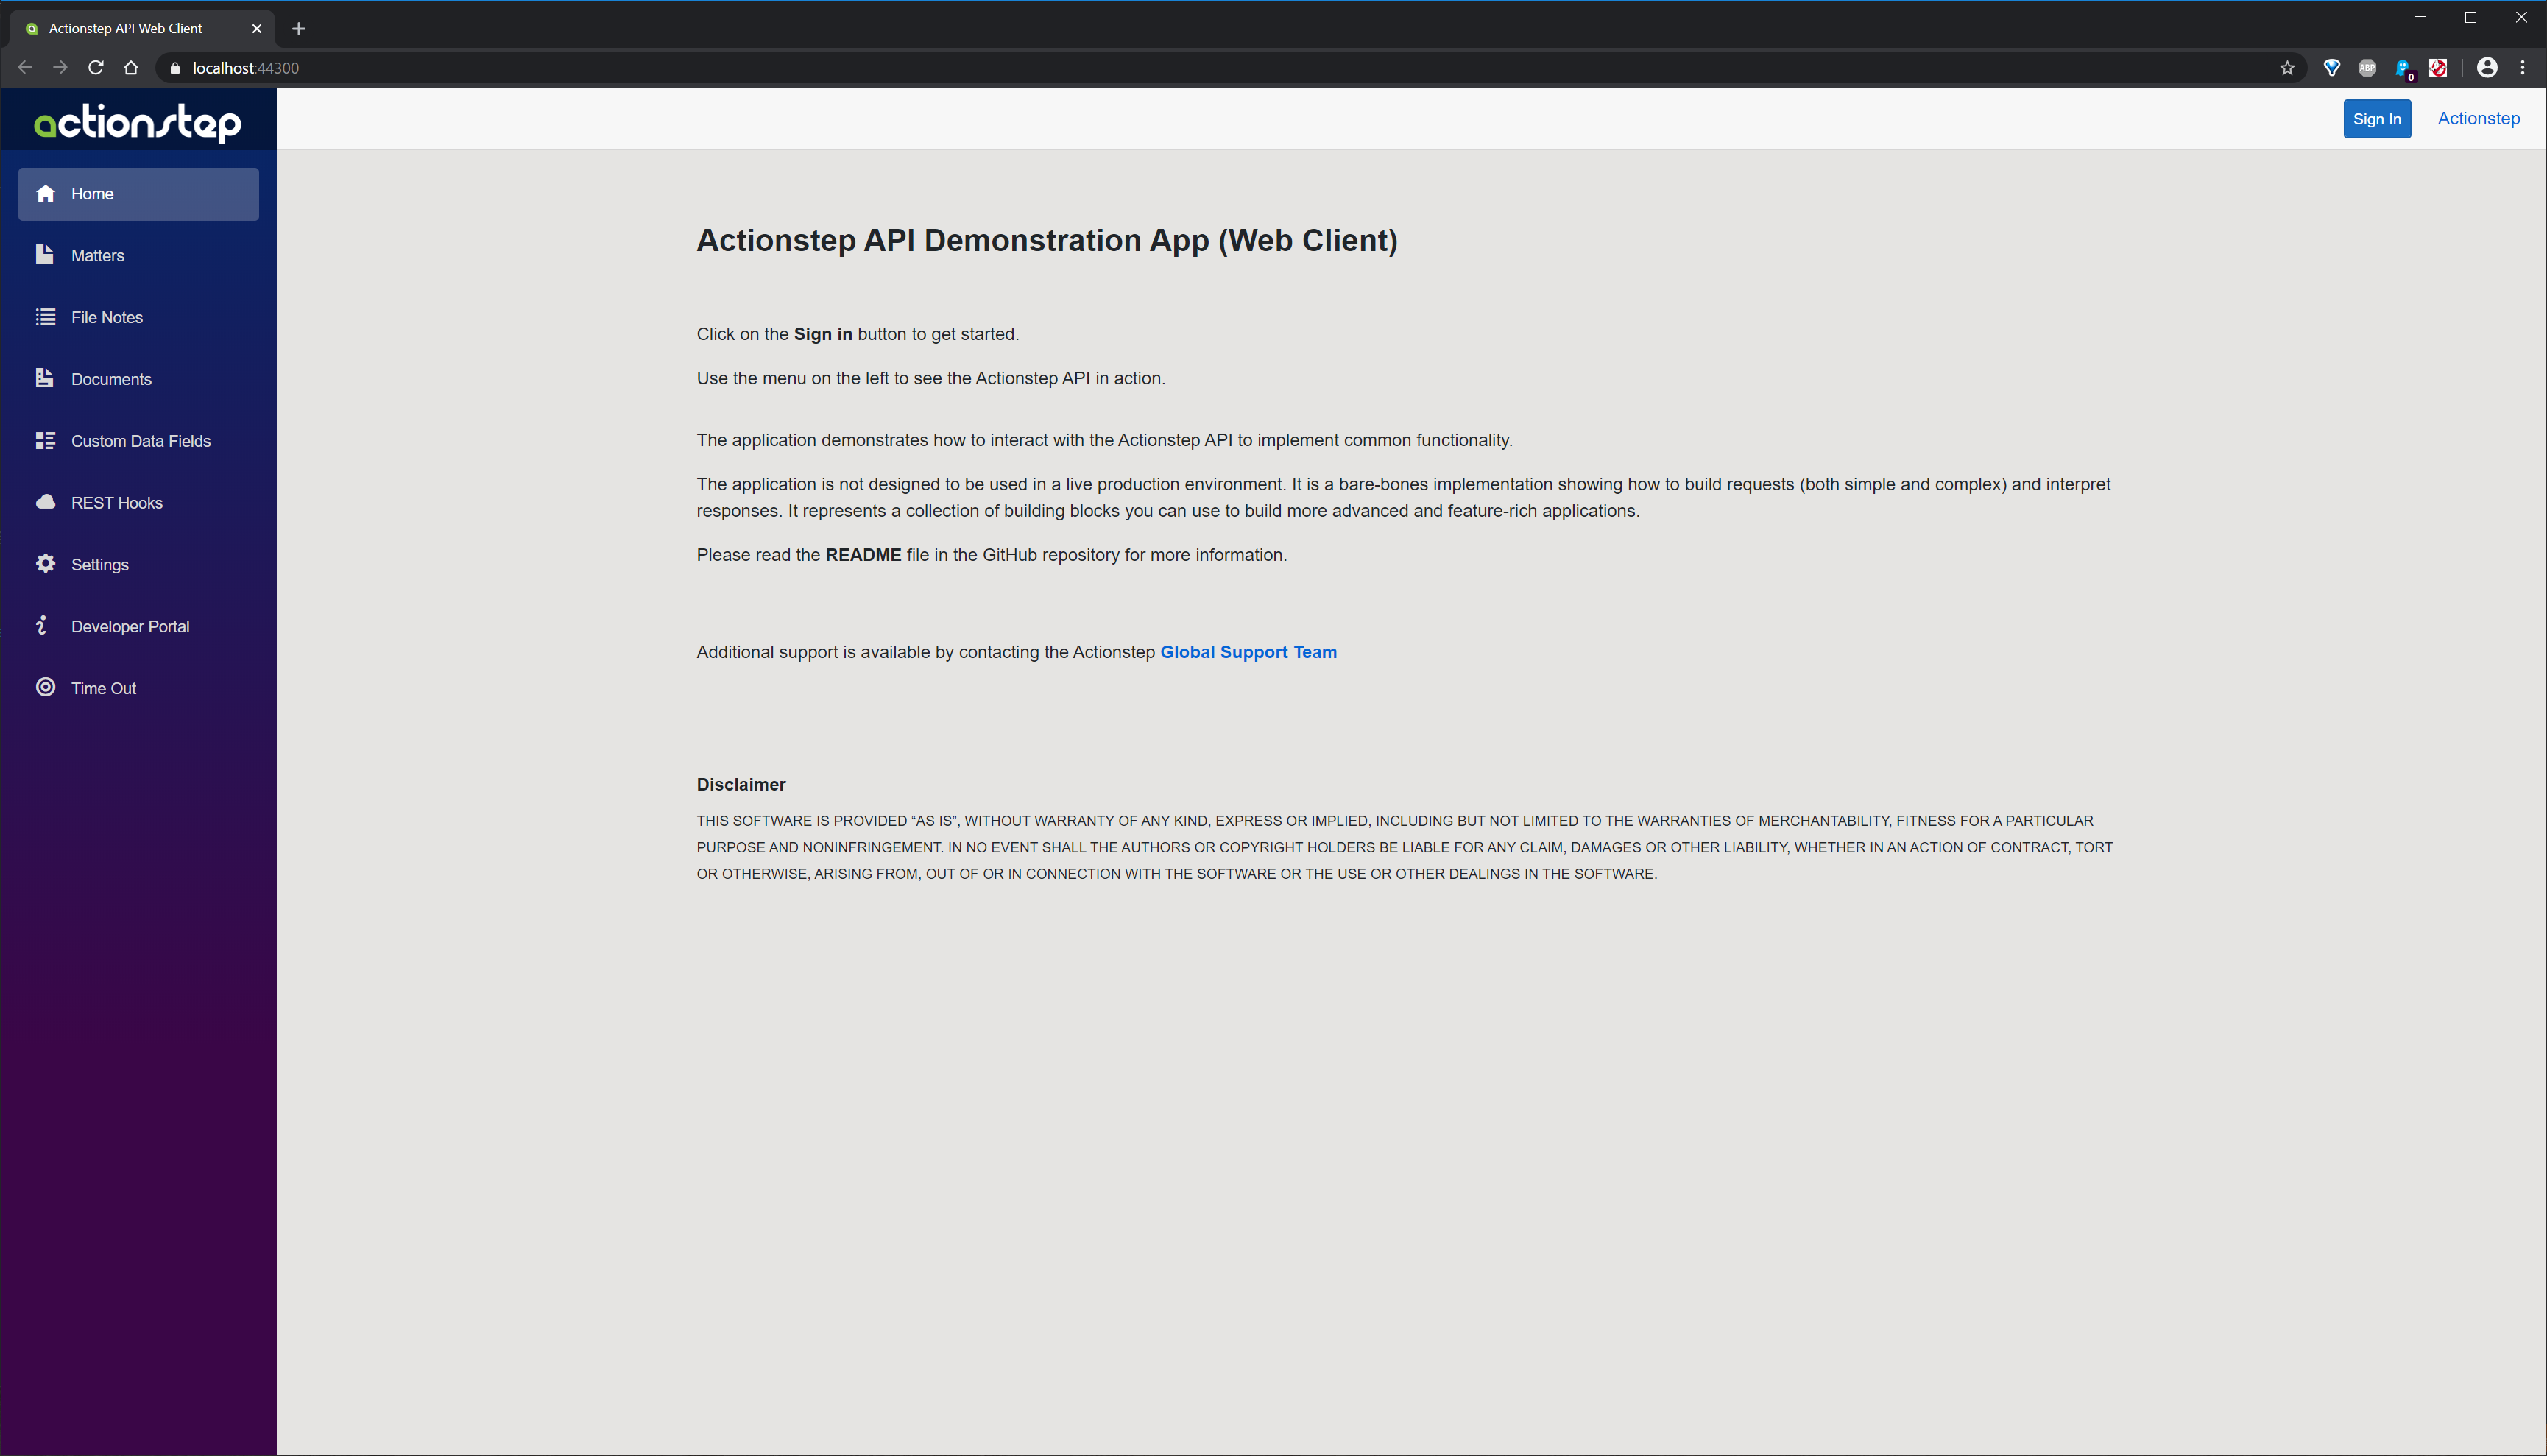
From within Visual Studio press F5 to run the application. The initial screen is shown below. You will notice that a number of menu options are disabled until you have signed in. Before you can sign in you first need to configure the application (see below).
Configuration
There are two ways you can configure the application to work in your particular development environment. The first is to use the settings page in the application itself, and the second is to update the project's appsettings.json file. When the application runs it initially loads configuration values from the appsettings.json file. Since these configuration values are unlikely to change during your project development we recommend manually updating the appsettings.json file. Please note any configuration changes made on the Application Settings page are only held in-memory while the application is running. They are not persisted back to the appsettings.json file. If you are using a free Ngrok account the redirect url will change each time you run Ngrok, and thus you will need to update the Redirect Url application setting accordingly.
Updating appsettings.json
A sample appsettings.json file is shown below. The file contains the key values required to authenticate against the Actionstep API. If you are using a free Ngrok account the only value you are going to likely need to change on a regular basis is the RedirectUrl property.
{
  "AppConfiguration": {
    "ClientId": "JICZJFSH6V9AC1IDHRZY3NLFCYHPDF0FNJYVWVPSJAHXQKSG",
    "ClientSecret": "7VEGLLSPUI4KHIDNGIB8QQMXZM86XLNR6HXDJ0LJDX2DS2OPIRW",
    "Scopes": "all",
    "AuthorizeUrl": "https://api.actionstepstaging.com/api/oauth/authorize",
    "AccessTokenUrl": "https://api.actionstepstaging.com/api/oauth/token",
    "RedirectUrl": "https://806aa6336214.au.ngrok.io/signin"
  },
  "Logging": {
    "LogLevel": {
      "Default": "Information",
      "Microsoft": "Warning",
      "Microsoft.Hosting.Lifetime": "Information"
    }
  },
  "AllowedHosts": "*"
}
Using the Settings Page
From the main menu in the application click on the Settings menu. This will display the settings page as shown below:
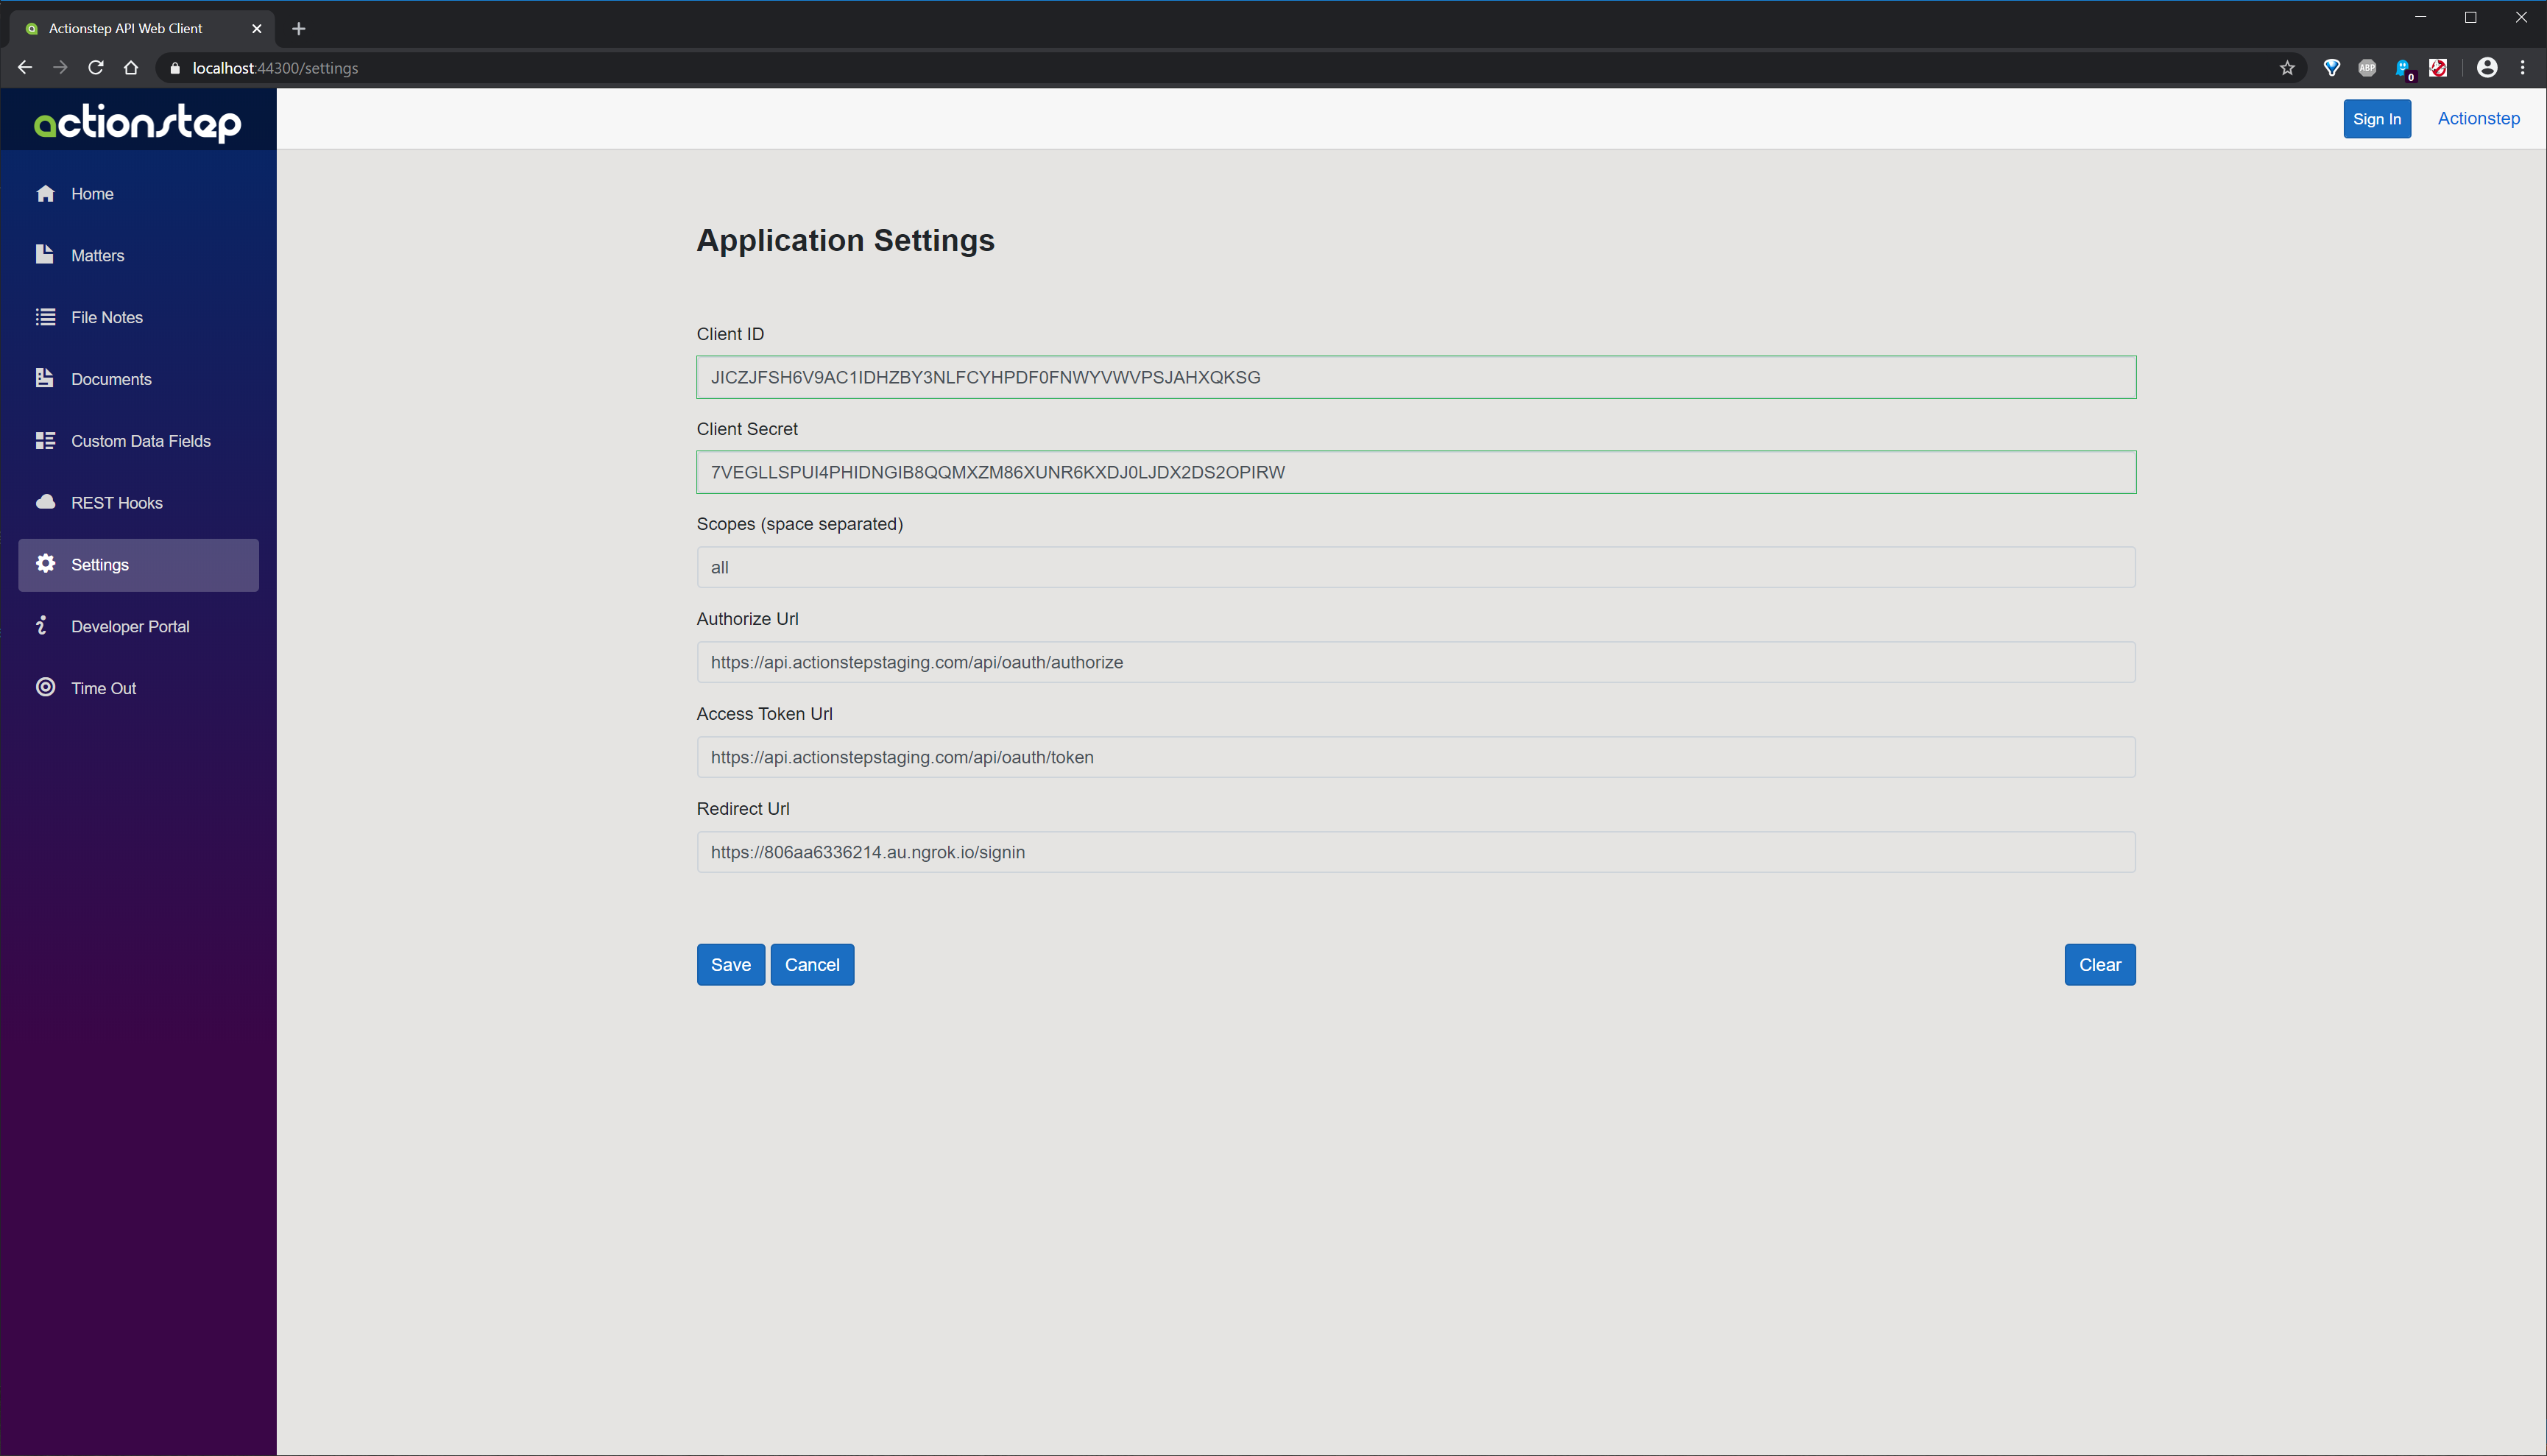
NB: Remember, changes are only saved in-memory, not to the appsettings.json file.
Signing In
Many of the menu options are only enabled once you have signed in to Actionstep and successfully completed the OAuth authentication process. To start the sign in process click on the Sign In button. You will see the familiar Actionstep login and grant authorization screens before returning you to the application. If you have been successfully logged in you should see your first name and OrgKey at the top of the screen on the right-hand side. You will also notice the url will have changed to show the effect of running Ngrok.

Source Code Structure
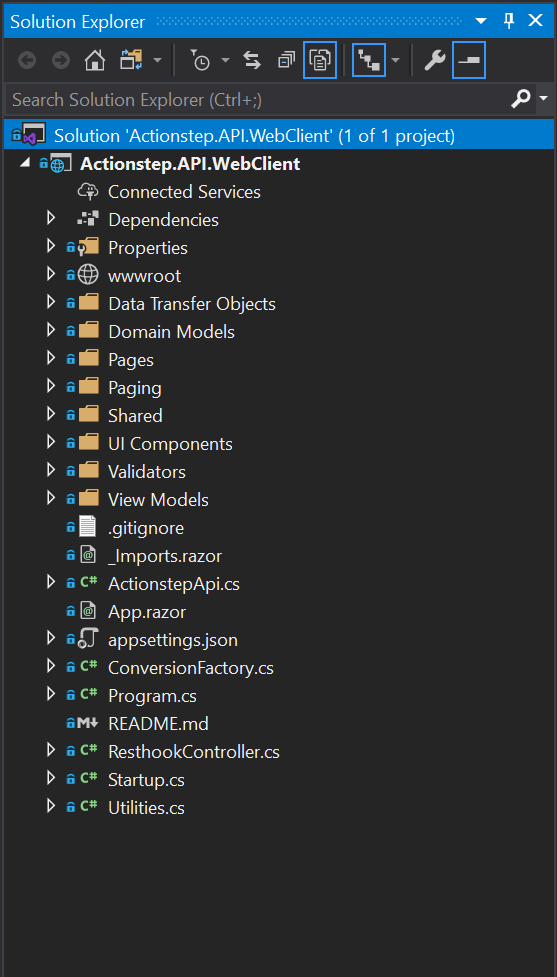
The source code structure is shown below in the image taken from Visual Studio. The solution is based on the Blazor (Server) project template. The folder structure and content are fairly self-explanatory. One file of particular interest is called ActionstepApi.cs. This single file encapsulates the interactions with the Actionstep API.
| Folder | Content Description |
|---|---|
| Data Transfer Objects | A collection of classes that describe the requests and responses, tagged with JSON attributes. |
| Domain Models | Classes used to describe internal representations of Actionstep domain objects. |
| Pages | The collection of razor pages forming the application's UI. |
| Paging | Supporting classes to support data paging and navigation. |
| UI Components | A collection of components to support item selection from dropdown lists. |
| Validators | Individual validation descriptor classes derived from Fluent Validation base classes. |
| View Models | View model classes for each of the pages and components. |
Core Functionality
The application's functionality is divided into five core areas.
File Notes
The file notes page demonstrates performing read, create, update, and delete operations. It also demonstrates the use of REST hooks for the file note creation event (assuming such a REST hook has been regsitered on the REST Hooks page).
Documents
The documents page demonstrates how to both upload and download a document associated with a matter.
Data Collections and Fields
The data collections and fields page demonstrates how to create a data field collection and the individual data fields within that collection. It shows how data collections are associated with a matter type, and how to set some of the core properties of a data field.
Matters (Custom Field Data)
The matters page demonstrates how custom data fields can be used to attach additional data items to a matter, using the data collections and fields created using the Data Collections and Fields page.
REST Hooks
The REST hooks page demonstrates how to register a web hook for an Actionstep event (the FileNoteCreated event) and how to respond to received callbacks.